

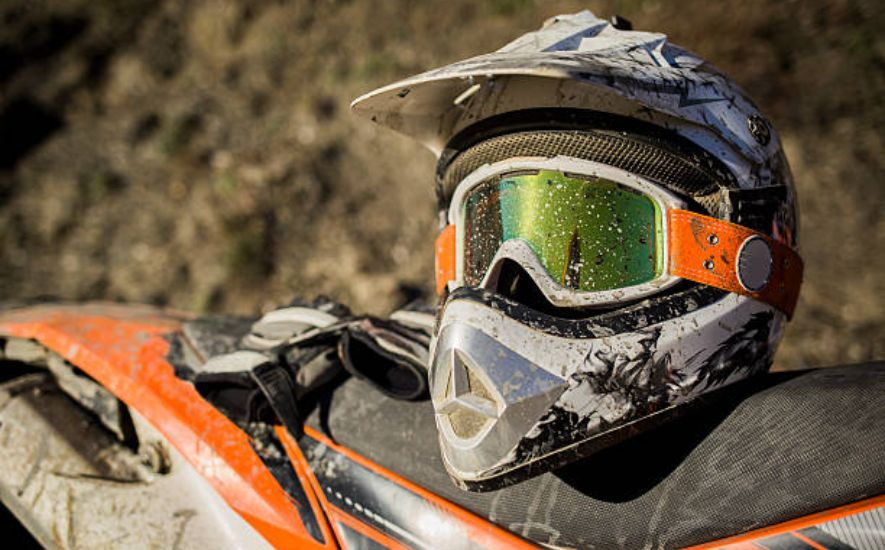
Revving up your dirt bike, feeling the wind in your face, and the thrill of adventure is an unbeatable experience. But when the adrenaline rush fades away, it's time to face the reality of cleaning your dirt bike helmet.
A dirty helmet is not only unappealing but also a potential safety hazard. Dust, mud, and sweat can accumulate over time, affecting the helmet's ventilation and visibility, putting you at risk.
Cleaning your dirt bike helmet is not rocket science, but it does require a bit of effort and attention to detail. It's not just about wiping the exterior; the interior and the helmet visor need attention too. But don't worry, with a little guidance, you can keep your helmet clean, fresh, and safe for your next ride.
In this article, we'll provide you with some tips and tricks to make your helmet cleaning process efficient and effective. From choosing the right cleaning products to handling delicate parts, we've got you covered. So, grab your helmet, let's dive in, and make it shine like new!
 Daniel
The Eco-Friendly Cleanse
As an avid dirt bike enthusiast, you understand the importance of clean and well-maintained motorcycle helmets. Not only does it enhance your safety, but it also prolongs the lifespan of your gear. However, conventional cleaning methods often involve harsh chemicals that can be detrimental to the environment.
I. Gathering the Green Tools
To embark on this eco-friendly cleanse, it's essential to assemble the right tools. Here are a few items that will play a pivotal role in your mission:
- Biodegradable Soap: Opt for a mild and biodegradable soap that is free from harmful chemicals. Look for eco-friendly options that are specifically designed for outdoor gear bag cleaning.
- Soft Microfiber Cloth: Choose a soft microfiber cloth that won't scratch or damage the surface of your helmet. These gentle fibers effectively trap dirt and grime without leaving residue.
- Natural Cleaning Agents: Explore the power of nature's cleaning agents. Ingredients like vinegar and baking soda can work wonders when it comes to removing stubborn stains and odors.
II. Pre-Clean Inspection:
Before diving into the cleansing process, give your dirt bike helmet's interior a thorough inspection. Identify areas that need special attention, such as mud-caked vents or sweat-soaked padding. This step will help you prioritize your cleaning efforts and ensure a comprehensive cleanse.
III. Deep Clean the Exterior:
- Step 1: Remove Loose Dirt: Begin by gently tapping the helmet to loosen any loose dirt or debris. You can also use a soft brush or toothbrush to carefully brush away the stubborn particles.
- Step 2: Soapy Solution: In a bucket, mix a small amount of biodegradable soap with warm water. Dip your microfiber cloth into the soapy solution and wring out any excess water. Thoroughly wipe down the exterior of the helmet, paying special attention to crevices and hard-to-reach areas.
- Step 3: Rinse and Dry: Once you've cleansed the entire helmet, rinse it under running water to remove any soap residue. Pat dry with a clean towel and allow it to air dry completely.
IV. Refreshing the Interior:
- Step 1: Remove Padding: Most dirt bike helmets come with removable padding. Carefully detach the pads according to the manufacturer's instructions and place them in a mesh laundry bag for cleaning.
- Step 2: Delicate Machine Wash: Pop the mesh bag containing the helmet pads into a washing machine. Use a mild detergent and choose a gentle cycle with cold water. Avoid using fabric softeners or bleach.
- Step 3: Air Dry: After the washing cycle is complete, remove the mesh bag and gently squeeze out excess water from the pads. Hang them up in a well-ventilated area to air dry naturally. Avoid using a dryer, as the heat may damage the padding.
V. Tackling Odors:
To combat unpleasant odors that may have accumulated over time, try these natural odor-fighting methods:
- Baking Soda: Sprinkle a generous amount of baking soda inside the helmet and let it sit overnight. The baking soda will absorb any lingering odors. The next day, remove the baking soda by gently tapping the helmet, followed by a thorough rinse.
- Vinegar Solution: Create a solution using equal parts vinegar and water. Lightly spritz the interior of the helmet and allow it to air dry. Vinegar's natural properties help eliminate odor-causing bacteria.
Ali
The High-Tech Cleaning Hack
Riding a dirt bike can be an exhilarating experience, but it often leaves your trusty helmet covered in layers of dirt, grime, and sweat. Cleaning your motocross helmets is not only important for hygiene but also essential for maintaining its performance and longevity.

The Quest for a Spotless Helmet:
Cleaning a dirt bike helmet can be a daunting task, as traditional methods often fall short of achieving that coveted spotless shine.
Scrubbing with regular soap and water may remove some surface dirt, but it fails to penetrate deep into the inner recesses of the helmet's padding and ventilation system. It's time to revolutionize the way we clean our helmets with a cutting-edge approach.
Enter the Ultrasonic Cleaner:
Imagine a device that could clean your dirt bike helmet without requiring extensive manual labor or the risk of damaging delicate components.
Introducing the ultrasonic cleaner, a high-tech marvel that employs sound waves to dislodge dirt particles from every nook and cranny of your helmet. This compact and user-friendly gadget has quickly become the secret weapon of helmet aficionados worldwide.
How Ultrasonic Cleaning Works:
Ultrasonic cleaning harnesses the power of microscopic bubbles generated by high-frequency sound waves. These tiny bubbles implode upon contact with the helmet's surface, creating a micro-jet effect that dislodges dirt and grime particles. The process is gentle yet highly effective, ensuring a thorough clean without compromising the integrity of your helmet.
Step-by-Step Cleaning Guide:
Now that you're familiar with the wonders of ultrasonic cleaning, let's dive into a step-by-step guide to get your dirt bike helmet looking as good as new:
Step 1: Disassemble your helmet: Remove any removable parts such as the visor, removable liner, and cheek pads. This allows for a more comprehensive cleaning and ensures that all areas of the helmet receive equal attention.
Step 2: Prepare the ultrasonic cleaner: Fill the ultrasonic cleaner's tank with a suitable cleaning solution, following the manufacturer's instructions. It's crucial to use a cleaning solution specifically formulated for helmet cleaning to achieve optimal results.
Step 3: Immerse the helmet components: Carefully place the disassembled helmet components into the ultrasonic cleaner's tank, ensuring they are fully submerged. The sound waves will work their magic, penetrating deep into the helmet's padding and crevices.
Step 4: Activate the cleaning cycle: Switch on the ultrasonic cleaner and set it to the appropriate cleaning cycle. Most helmet cleaner offer different intensity levels, allowing you to adjust the cleaning power based on the condition of your helmet. Sit back and let the ultrasonic cleaner do the hard work for you.
Step 5: Rinse and dry: Once the cleaning cycle is complete, remove the helmet components from the cleaner. Rinse them thoroughly with clean water to remove any residual cleaning solution. Afterward, allow the components to air dry or use a soft cloth to gently pat them dry. Ensure all parts are completely dry before reassembling your helmet.
The Benefits of High-Tech Cleaning:
By adopting the high-tech cleaning hack of using an ultrasonic cleaner, you unlock several benefits for your dirt bike helmet:
- Unmatched cleanliness: The ultrasonic cleaning process reaches every nook and cranny of your helmet, ensuring a deep and thorough clean that surpasses traditional cleaning methods.
- Time and effort savings: Cleaning your helmet manually can be time-consuming and labor-intensive. With an ultrasonic cleaner, you can effortlessly clean your helmet while focusing.
Emma
The Deep Dive Helmet Spa Treatment
For passionate dirt bike riders, their helmet is more than just a piece of equipment. It's a symbol of adventure, freedom, and adrenaline.

But after long and dusty rides, the helmet can accumulate dirt, sweat, and bacteria, which not only looks gross but also poses a health hazard. Fortunately, there is a solution: the deep dive helmet spa treatment.
What is a Deep Dive Helmet Spa Treatment?
Think of it as a day spa for your helmet. Instead of just wiping the outside with a damp cloth, a deep dive helmet spa treatment involves a thorough and meticulous cleaning of all the nooks and crannies, both inside and outside. It's like giving your helmet a fresh start, free of dirt, odor, and bacteria.
Why is it Important?
Cleaning your motocross helmet regularly is crucial for several reasons. Firstly, it prevents the buildup of dirt, sweat, and bacteria that can cause skin irritation, rashes, and infections. Secondly, it extends the life of your helmet by preventing corrosion and degradation of the materials. Lastly, a clean helmet simply looks better and more professional, which can boost your confidence on the track.
The Step-by-Step Process
- Disassembly: First, remove all removable parts of the helmet, such as the visor, chin strap, and padding. This will allow you to clean each part individually and reach all the hidden areas.
- Soak: Fill a basin with warm water and a mild soap solution, such as baby shampoo. Submerge the helmet and its parts in the solution and let them soak for at least 30 minutes. This will loosen the dirt and grime, making them easier to remove.
- Scrub: Using a soft-bristled brush, gently scrub the outside of the helmet and all the removable parts. Pay special attention to the vents, crevices, and seams. For stubborn stains, use a toothbrush or a cotton swab.
- Rinse: Rinse the helmet and its parts thoroughly with clean water. Make sure there is no soap residue left behind.
- Disinfect: To kill any remaining bacteria or odor, spray the inside of the helmet with a disinfectant spray. You can also add a few drops of tea tree oil or vinegar to the rinse water for added antibacterial properties.
- Dry: Let the helmet and its parts air dry completely before reassembling them. Avoid using a hair dryer or other heat sources, as they can damage the materials.
Ali
Frequently Asked Questions (FAQs)
In this FAQ guide, we will provide you with instructions and useful tips on how to clean your dirt bike helmet effectively and safely.
What should I clean my bike helmet with?
Keeping your bike helmet clean is essential for both safety and comfort while riding. But it's important to use the right cleaning products to avoid damaging the helmet's materials or compromising its safety. A mild soap solution and warm water are generally safe to use on most bike helmet models.
However, you should avoid using harsh chemicals or solvents that can cause the helmet's outer shell or inner lining to deteriorate. You can also use specialized helmet cleaning products that are specifically designed to remove dirt, sweat, and grime without damaging the helmet's surface.
What is the best way to clean a bike helmet?
Cleaning a motorcycle helmet is crucial for maintaining its effectiveness and durability. The best way to clean a bike helmet is by using mild soap and warm water. Start by removing any loose dirt or debris from the helmet's surface.
Then, gently scrub the helmet with a soft cloth or sponge and the soap solution, making sure to clean all areas, including vents and crevices. After cleaning, rinse the helmet thoroughly with clean water and allow it to air dry.
How do you clean the inside of an MX helmet?
Cleaning the inside of an MX helmet is just as important as cleaning the outside. The best way to clean the inside of an MX helmet is by using a mild soap solution and warm water. Start by removing the helmet's liner and pads, following the manufacturer's instructions.
Gently wash the helmet liner and pads in the soap solution and rinse thoroughly with clean water. Allow the liner and pads to air dry completely before reattaching them to the helmet. To clean the helmet's shell, use a soft cloth or sponge and the same soap solution, making sure to avoid getting any water or soap in the helmet's vents or electronics.
Conclusion
In conclusion, cleaning your dirt bike helmet properly is essential to maintaining its quality and ensuring its longevity. By following the steps mentioned above, you can easily clean your helmet and remove dirt, grime, and other contaminants that may accumulate over time.
Remember always to use the right cleaning products and take the necessary precautions to avoid damaging the helmet. By taking good care of your helmet, you can ensure that it continues to provide optimal protection for years to come, giving you the confidence and peace of mind you need to hit the trails with confidence. Happy riding!
Ali