
When heading out into the great outdoors, there's nothing quite like the freedom and serenity of camping. But let's face it, there's one aspect of the experience that's not quite as idyllic: answering nature's call. While many campgrounds and outdoor areas have public restrooms, they can often be far away from your campsite, or not available at all. That's where a camp toilet comes in handy.
Creating a makeshift toilet might seem daunting, but it's actually a simple process that can be done with just a few materials. With a bit of ingenuity, you can make your own camp toilet that's easy to use, hygienic, and eco-friendly.
In this article, we'll guide you through the steps of creating your own camp toilet, whether you're car camping, backpacking, or just looking for a more comfortable and convenient way to take care of business while enjoying the great outdoors.
We'll cover everything from choosing the right materials to assembling your toilet, as well as tips for keeping it clean and sanitary. So, let's get started and learn how to make a camp toilet that will make your next outdoor adventure all the more enjoyable!
 Daniel
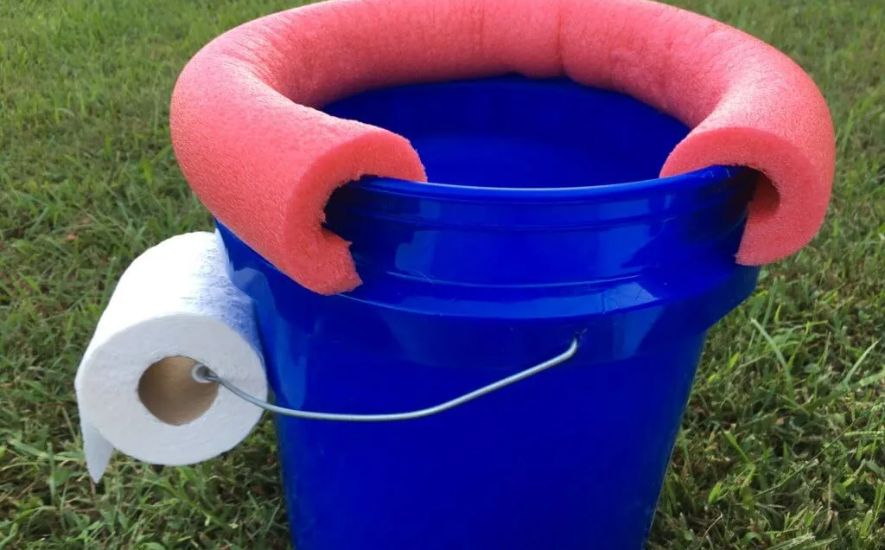
Basic Bucket Toilet
When it comes to outdoor activities, there's nothing quite like roughing it in the great outdoors. From hiking to camping, a certain thrill comes with being out in nature, unplugged from modern conveniences.
However, one of the downsides of being away from civilization is the lack of bathroom facilities. Fortunately, with a few simple supplies and a bit of know-how, you can create a basic bucket toilet that will make your outdoor experience more comfortable and convenient.
Supplies
- A 5-gallon bucket with a tight-fitting lid
- A pool noodle or foam cushion
- Heavy-duty trash bags
- Cat litter or sawdust
- Paper towel
- Hand sanitizer or baby wipes
Step 1: Prepare the Bucket
The first step in creating a bucket toilet is to prepare the bucket itself. Start by cleaning the bucket thoroughly and allowing it to dry completely. Once the bucket is dry, attach a pool noodle or foam cushion to the top of the bucket to create a comfortable seat.
Step 2: Line the Bucket with a Garbage Bag
Next, line the bucket with heavy-duty garbage bags. Make sure the bag fits snugly around the inside of the bucket and extends up and over the sides. This will help to contain any waste and make it easier to dispose of later.
Step 3: Add Absorbent Material
To keep the bucket toilet odor-free and hygienic, it's important to add absorbent material to the bottom of the bag. Cat litter or sawdust works well for this purpose. Simply sprinkle a generous layer of litter or sawdust into the bottom of the bag before use.
Step 4: Use the Toilet
When it's time to use the toilet, sit on the foam cushion or foam pool noodle and do your business as usual.
Afterward, use toilet paper to wipe and dispose of it in the garbage bag. Be sure to use plenty of litter or sawdust to cover your waste, which will help to absorb any odor and keep the area clean.
Step 5: Dispose of Waste
When you're ready to dispose of the waste, carefully tie up the garbage bag and place it in a designated waste disposal area. Remember to always follow Leave No Trace principles and dispose of waste properly to minimize environmental impact.
Emma
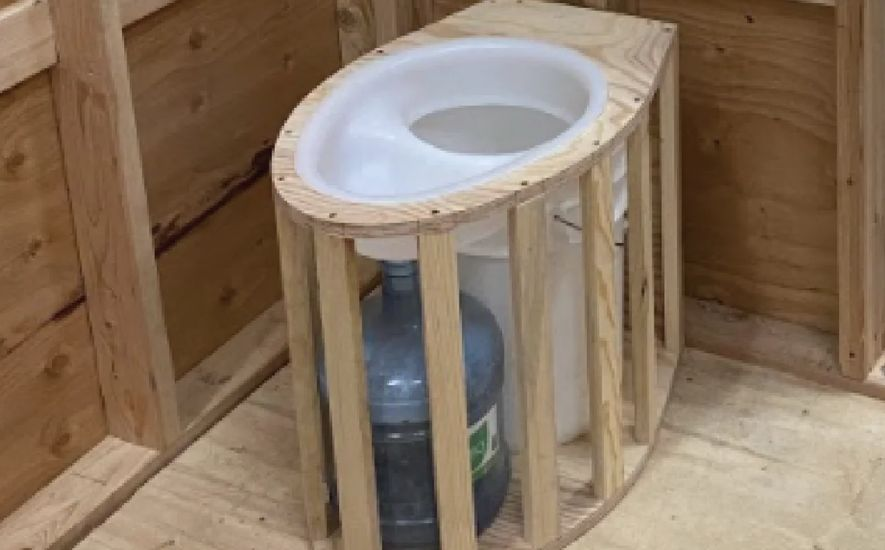
DIY Composting Toilet
When you're out in the great outdoors, it's important to have a reliable and convenient way to dispose of your waste. While traditional pit latrines or porta-potties may do the job, they can be expensive, heavy, and difficult to transport.
But fear not because, with some creativity and elbow grease, you can make your own DIY composting toilet!
Materials
To build your own composting toilet, you'll need a few key materials. First and foremost; you'll need a bucket or container to serve as the receptacle for your waste. You'll also need a sturdy seat to attach to the top of the bucket and some kind of lid or cover to keep odors at bay.
For the composting portion of the toilet, you'll need a separate container or bin to collect and store the compost and some type of composting material, such as sawdust or peat moss.
Building the Toilet
Once you have your materials gathered, it's time to start building your DIY composting toilet. Begin by drilling a hole in the center of your bucket or container, just large enough to fit your toilet seat.
Then, attach the seat securely to the top of the bucket, making sure it's level and stable. Next, add your cover or lid to the top of the seat to help contain any odors. Finally, place the bucket on a sturdy base or platform like a wooden pallet to elevate it off the ground.
Composting
Now that your toilet is built, it's time to start composting. Begin by adding a layer of composting material to the bottom of your bucket, then use your toilet as you normally would. After each use, add another layer of composting material on top of your waste to help absorb any excess moisture and control odors.
When the bucket is full, transfer the contents to your separate compost bin, adding more composting material as needed. Over time, the waste will break down and turn into nutrient-rich soil that can be used to fertilize your garden or flower beds.
Maintenance
Maintaining the compost pile is important to keep your DIY composting toilet in good working order. This means regularly adding fresh composting material and turning the pile to ensure that all parts decompose evenly.
You may also need to add water to the compost pile if it becomes too dry, or cover it with a tarp if it becomes too wet. Additionally, it's important to clean and sanitize the bucket and seat regularly to prevent the buildup of harmful bacteria or pathogens.
Emma
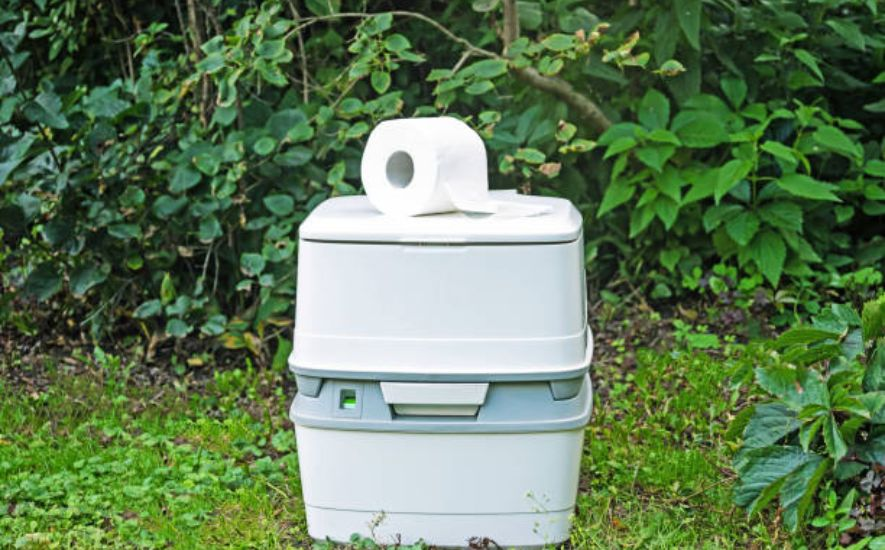
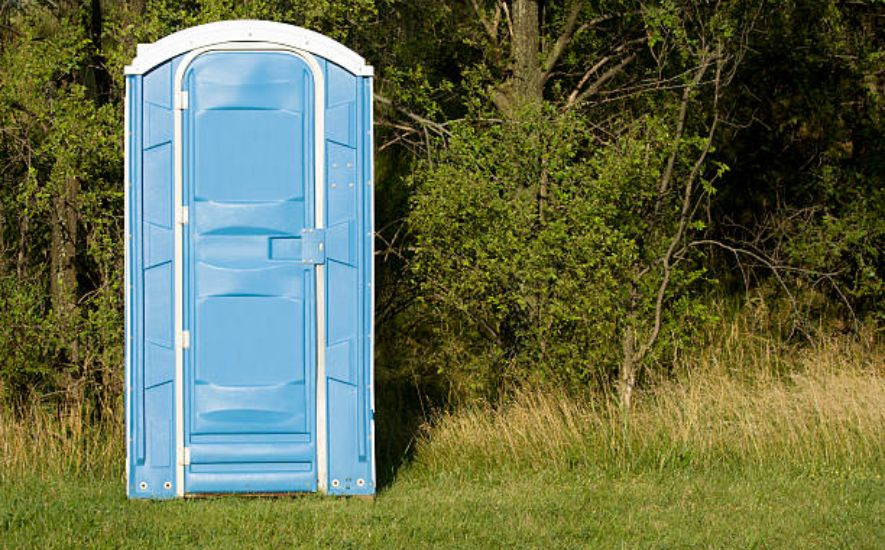
Portable Chemical Toilet
Ah, the great outdoors! Exploring new territories and hiking up the mountains is always an adventure. But with nature's beauty also comes nature's call. When nature calls, and you're nowhere near a restroom, what do you do? You need a portable toilet.
But, a portable toilet is not always available in remote areas, and digging a hole in the ground is inconvenient and harmful to the environment.
That's where a portable chemical toilet comes in handy! It's an essential piece of equipment for anyone planning an extended camping trip.
Benefits of using a portable chemical toilet
A portable chemical toilet offers several benefits over traditional camping toilets. Firstly, it's more hygienic and prevents the spread of disease-causing bacteria. The toilet has a chemical solution that breaks down the waste and kills bacteria, which ensures that the toilet is always clean and fresh.
Secondly, it's more convenient and comfortable than digging a hole in the ground. The toilet is at waist level, which means you don't have to squat or bend down to use it. Thirdly, it's better for the environment. Since the toilet has a built-in waste storage tank, you don't have to worry about polluting the environment.
How a portable chemical toilet works
A portable chemical toilet is a simple device that works using a chemical solution. The bathroom has two main compartments: the upper compartment and the lower compartment. The upper case is the seat, while the lower compartment is where the waste is collected.
The toilet has a chemical solution that is added to the lower compartment before use. The chemical solution breaks down the waste and neutralizes any odor.
After use, the waste is collected in the lower compartment, and the chemical solution continues to break it down until it can be disposed of properly.
Tips on how to use a portable chemical toilet
Using a portable chemical toilet is straightforward. Here are some tips to make sure you use it correctly:
- Before use, ensure the toilet is set up on a level surface, and the waste tank is securely attached.
- Add the chemical solution to the waste tank before use.
- Sit on the seat and do your business as you would in a regular toilet.
- After use, add more chemical solutions to the waste tank.
- Dispose of the waste properly at a designated waste disposal facility.
Emma
Frequently Asked Questions (FAQs)
Looking for a convenient and hygienic solution to answer nature's call in the great outdoors? Look no further than a camp toilet! Whether you're car camping, backpacking, or enjoying a music festival, a well-made camp toilet can help keep your campsite clean and comfortable. Here are some FAQs to help you make your own camp toilet.
How to make a temporary toilet?
If you need to make a temporary toilet in an emergency situation, you can follow these steps:
- Find a container with a lid, such as a bucket or a large plastic container.
- Line the container with a plastic bag or a trash bag.
- Cut a hole in the lid of the container.
- Place a toilet seat or a cushion on top of the lid to make it more comfortable to sit on.
- Place the container in a private area and use it as you would a regular toilet.
- After each use, add some kitty litter or sawdust to the container to help absorb any odors.
It's important to dispose of the waste properly and by local regulations. Be sure to seal the plastic trash bag and dispose of it in a designated waste disposal area.
What can I use for the toilet for camping?
You can use a portable homemade camping toilet or a makeshift toilet when camping. Portable camping toilets come in various sizes and designs and can be purchased or rented from outdoor retailers. These toilets often have a waste tank that can be emptied and cleaned at a designated waste disposal area.
If you prefer to make your own toilet, you can use a bucket or a large plastic container, line it with plastic bags or trash bags, and add a toilet seat or cushion on top. You can also make a toilet out of natural materials, such as digging a hole in the ground and covering it with wood or cardboard.
It's important to dispose of the waste properly and follow local regulations. Be sure to seal the plastic bag and dispose of it in a designated waste disposal area.
How to make a cheap camping toilet?
If you're looking to make a cheap camping toilet, you can follow these steps:
- Find a large bucket or a plastic container with a lid.
- Line the container with a plastic bag or a trash bag.
- Cut a hole in the lid of the container.
- Place a toilet seat or a cushion on top of the lid to make it more comfortable to sit on.
- Place the container in a private area and use it as you would a regular toilet.
- After each use, add some kitty litter or sawdust to the container to help absorb any odors.
You can also use natural materials, such as digging a hole in the ground and covering it with wood or cardboard. Alternatively, you can own a camping toilet seat attached to a five-gallon bucket.
Remember to dispose of the waste properly and in accordance with local regulations. Be sure to seal the plastic bag and dispose of it in a designated liquid waste disposal area.
What is a lazy toilet?
A lazy toilet is a term used to describe a toilet that has a weak flush or slow drainage. This can be caused by a variety of factors, such as a clogged drain, a malfunctioning flush valve, or a faulty flapper.
A lazy toilet can be frustrating and inconvenient, as it may require multiple flushes or the use of a plunger. To fix a lazy toilet, first try using a plunger to remove any blockages in the drain.
If that doesn't work, check the flush valve and flapper to ensure they are functioning properly. In some cases, a lazy toilet may require the help of a professional plumber to diagnose and repair the issue.
Conclusion
In conclusion, learning how to make a camp toilet can greatly enhance your outdoor experience by providing a safe and hygienic solution for your bathroom needs.
With some creativity and basic materials, you can easily construct a functional and eco-friendly camp toilet that will help you stay clean and comfortable in the great outdoors.
So, whether you're a seasoned camper or a first-timer, don't let the lack of modern facilities hold you back. Embrace the adventure and build your own camp toilet for a more enjoyable and fulfilling camping trip. Happy camping!
Emma